Daylight harvesting – also known as daylight-linked or daylight-dependent lighting control – means that a light sensor continuously measures the brightness in the room, and the control system dims the artificial lighting just enough for daylight and artificial light together to reach the required level. When the sun is shining, the luminaires deliver only a fraction of their output or switch off altogether. This saves energy without reducing the illuminance at the workstation. In this guide you will learn how it works technically, how to plan daylight zones correctly and which mistakes to avoid.
The principle: measure mixed light, adjust artificial light
In every room with windows, the amount of daylight available changes constantly – over the course of the day, with the weather and with the seasons. Conventional lighting ignores this and always delivers full output. Daylight-linked control, on the other hand, closes the loop:
- A light sensor (photocell) on the ceiling or in the luminaire measures the reflected mixed light from daylight and artificial lighting.
- The control system compares the measured value with a setpoint that was calibrated during commissioning.
- If it is brighter than necessary, the artificial lighting is dimmed; if it is darker, the output is increased.
Because the sensor measures the total light, this is referred to as closed-loop control. It compensates not only for daylight, but also for dirt build-up and ageing of the luminaires.
Control, switching and constant light – the variants
| Variant | How it works | Typical application | Assessment |
|---|---|---|---|
| Daylight-linked switching | lights off above a threshold, on below it | corridors, outdoor areas, halls with rooflights | simple, but switching is visible |
| Daylight-linked dimming | continuous adjustment to the setpoint | offices, schools, administrative buildings | highest savings with high comfort |
| Constant light control | compensates for the maintenance factor, even without daylight | all rooms with new LED installations | additional savings when new |
| Hold ON/OFF with photocell | lights are not switched on, or not held on, when there is enough light | outdoor areas, halls | robust, little setup effort |
Why constant light control is often forgotten
Lighting installations are designed with a maintenance factor: because luminaires age and get dirty, they are deliberately brighter than necessary when new. Constant light control dims away this surplus and gradually raises the output over the service life. The savings vary from project to project; 10 to 20% is often quoted as a guide value. They are independent of daylight and therefore also apply in windowless rooms.
What illuminance should you aim for?
The control setpoint is based on the requirements of the visual task in question. In Germany, the relevant standard is DIN EN 12464-1 (Lighting of indoor work places), supplemented by the German Technical Rule for Workplaces ASR A3.4. For office work such as writing, reading and data processing, the standard specifies a maintained illuminance of 500 lx in the task area. Different values apply to other activities – always check them against the current edition of the standard.
Planning daylight zones correctly
The amount of daylight falls off sharply with increasing distance from the window. Good design therefore divides rooms into zones:
- Window zone: high daylight contribution; on many days the artificial lighting is largely dimmed or off.
- Middle zone: daylight is partly sufficient on bright days.
- Inner zone: hardly any daylight contribution; presence detection and constant light control do most of the work here.
As a rough guide, the usable daylight zone extends into the room to around 1.5 to 2 times the height of the window head. Shading, neighbouring buildings, solar shading, glazing and room surfaces shift this boundary significantly. A daylight simulation provides an accurate answer.
Room-level or luminaire-level control?
Traditionally, one ceiling sensor per room or zone takes the measurement and controls a group of luminaires together. This is cost-effective but imprecise: the luminaire next to the window receives the same dimming command as the luminaire by the inner wall.
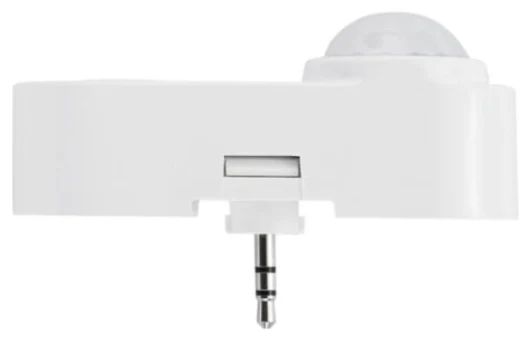
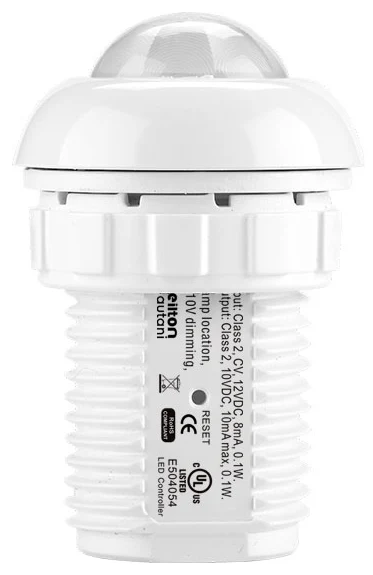
Luminaire level lighting control (LLLC) is more precise: each luminaire has its own presence and light sensor and regulates itself individually. Zoning therefore happens automatically – each luminaire delivers exactly as much light as is missing at its location. The Keilton+autani sensors IFS108 and IFS105SE are designed for this application and combine PIR detection with daylight harvesting at mounting heights of 2 to 5 m. Find out more about the concept in our guide LLLC / NLC5 explained.
Daylight harvesting in halls and warehouses
Simulation in Sensora, our own planning software: as the sun rises, the luminaires dim down step by step – averaging around 50 % output over the day.
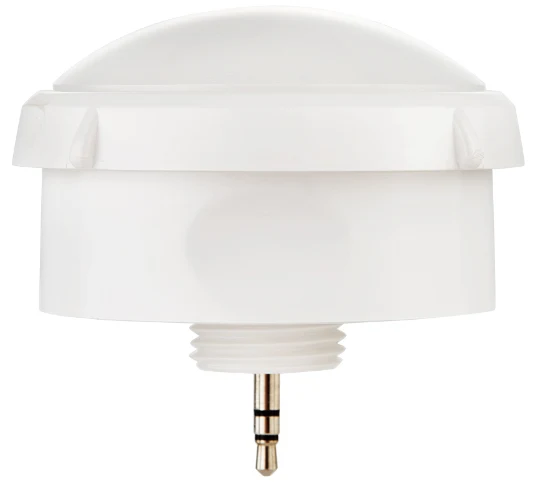
Halls with continuous rooflights or skylights offer considerable daylight potential that often goes unused. The high-bay sensors EFS106 and EFS104 combine PIR detection with daylight harvesting for mounting heights of up to 22 m (EFS104 with HBL3-2 lens). The rugged EFS106W variant also offers a photocell for Hold ON/OFF operation in outdoor and damp areas. You will find details on planning at great heights in our guide high-bay sensors for warehouses and industrial halls.
Requirements on the luminaire side
Daylight-linked control requires dimmable control gear. Typical interfaces are 0–10 V, PWM or DALI. Pay attention to the following:
- Dimming range: the lower the driver can dim, the longer the lights stay on at a dimmed level during transitional periods instead of switching abruptly.
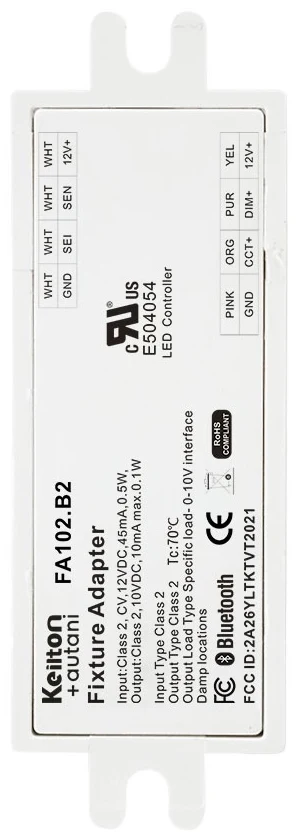
- Dim-to-off: drivers with a dim-to-off function can switch off completely via the control signal. The Bluetooth node FA102, for example, is powered via a 12 V input from dimmable LED drivers with dim-to-off functionality and provides 0–10 V or PWM outputs.
- Standby consumption: when luminaires are dimmed or switched off, the self-consumption of the driver, sensor and wireless node becomes relevant. Compare the power ratings in the datasheets, especially for large quantities and long switch-off periods.
Common mistakes and how to avoid them
- The sensor “sees” the window: if the light sensor looks directly at a window, it measures too much light and dims too much. Position the sensor so that it mainly covers the working area.
- Solar shading not taken into account: when the blinds are closed, daylight drops abruptly. The control must respond quickly enough without flickering. A smooth control speed with a short response time when raising the output has proven effective.
- No recalibration: new furniture, different floor coverings or moves change the reflectances. Plan a check after occupation.
- Setpoints set too high “to be on the safe side”: every lux above what is needed costs energy. Follow the standard and only adjust if there is a proven need.
- Users are not involved: people who understand how the control behaves and can intervene with a push button when necessary will accept the automation. A wall switch such as the WP108E with dimming buttons and scenes gives users this option.
Working together with presence detection
In practice, daylight control and presence detection go hand in hand. A typical sequence in an office with a glazed façade looks like this:
- Morning, room empty: the lights stay off because no occupancy is detected.
- The first person enters the room: the luminaires switch on and immediately regulate to the setpoint – the window row significantly dimmed, the inner row at a higher output.
- Midday, high daylight levels: the window row dims further or switches off, and the inner row partly follows.
- After the room is vacated: once the hold time has expired, the luminaires dim to a background level or switch off.
In networked systems such as Keilton+autani, this logic is stored in the sensors and configured via the app – with no additional control cabling. To learn how presence detection itself works, read our guide presence detectors vs. motion detectors.
How much does daylight harvesting save?
The savings depend heavily on window area, orientation, room depth and hours of use. In zones close to the window, the artificial lighting can be largely dimmed for hours on bright days, whereas the effect is small in inner zones. The greatest savings come from the combination: presence detection, daylight control, constant light control and – where needed – time schedules. Together with LED technology, lighting energy savings of up to 90% compared with uncontrolled legacy installations are possible. The savings calculator provides a project-specific estimate. You will find background information on the calculation in our guide calculating energy savings from lighting control.
Conclusion
Daylight harvesting is one of the most effective ways to reduce lighting energy demand in daylit spaces – with no loss of comfort. What matters is sensible zoning, correctly calibrated sensors and dimmable control gear. Luminaire level control offers the finest resolution, because every luminaire takes its own measurements. Adding constant light control and presence detection lets you exploit the full savings potential.
Try it interactively
Room simulator
Frequently asked questions
What is daylight harvesting?
Daylight harvesting is daylight-linked control of the lighting. A light sensor measures the mixed light from daylight and artificial lighting, and the control system dims the luminaires just enough for the two together to reach the required setpoint. This means only as much artificial light is produced as is actually missing.
What is the difference between daylight control and constant light control?
Daylight control compensates for fluctuating daylight. Constant light control additionally compensates for the maintenance factor: new installations are deliberately oversized and are dimmed down to the required level. Both functions use the same light sensor and complement each other.
What illuminance does an office workstation need?
For writing, reading and data processing, EN 12464-1 specifies a maintained illuminance of 500 lux in the task area. Different values apply to other activities. Always check the requirements against the current edition of the standard and, in Germany, the workplace rule ASR A3.4.
Where should the light sensor be mounted?
The light sensor should mainly cover the working area and not look directly at windows or bright outdoor surfaces. It measures the light reflected towards the ceiling, so the setpoint must be matched to the workstation using a lux meter during commissioning.
Which luminaires are suitable for daylight-linked control?
Luminaires with dimmable control gear are suitable, for example with a 0–10 V, PWM or DALI interface. A wide dimming range and a dim-to-off function are advantageous. For luminaire level control, sensors are mounted directly in or on the luminaire.